Table des matières
Introduction
Some of the general parameters of a campaign, as well as the body of the message, can include personalization variables.
When the campaign is sent, these variables will be replaced by the corresponding value in the recipients' file.
In addition to the email address, the recipient file can contain 8 columns, so there are 8 possible personalization variables.
Build a campaign with personalization
Creation of a test file
To start, create a mini file with test recipients.
In the first column place the email address. In the additional columns, place the information of your choice. The order and the type of information are not important, but it is imperative that each column contains homogeneous information from the beginning to the end of the file (for example only phone numbers or only names, ...).
In Excel, the file will look like this:

In this example, the first line contains headers. This line is entirely optional, it makes it easier to find your way around when creating the file. It will be deleted anyway when importing into the platform, as the email will be considered invalid.
We then save this Excel file in CSV format (semicolon separator).

Attention: Select CSV (semicolon separator) and not CSV (Macintosh), (Windows) or (DOS), ...
Opened with a text editor the file should look like this:

Identify customization variables
Import the CSV test file into the MDWorks platform (after clearing the recipient file if one was previously imported. The test campaign recipient file should contain only the test addresses).
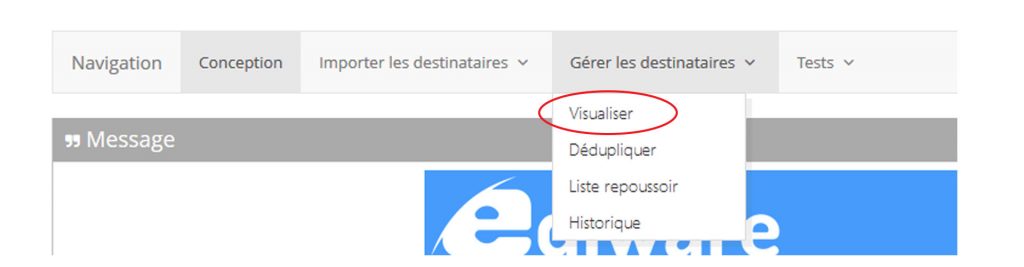
Click on "View".
This page displays the first 20 records in the recipient file.

The last row of the table contains the personalization variables to be used to personalize the message.
The two variables %nom% and %prenom% can correspond to something other than first and last names. We have simply kept these two variable names to ensure compatibility with previous versions of the platform in which only these two variables were available.
You can modify a line by double clicking on it.
Use the box to the right of the line to indicate that this email address will be used for the personalized proof (see MDWorks:Test_the_campaign)
Use customization variables
In this example, if I want to see "Mr. Loïc Bresler" displayed somewhere in my message, the code to use is :
%p1% %prenom% %nom%
When sending the message, the platform replaces each personalization variable with the corresponding value from the file.
This is also valid if the value is empty (for example if you are missing information for some people in the recipient file).
What can we customize?
Customization variables can be placed :
- In the body of the message, anywhere, including in a URL (to display different images or propose different links depending on the value of a customization variable, ).
- In the object
To display for example in the subject: Offer reserved for Mr X
- In the sender's name and in the reply email
Example: Each salesperson in a company has his or her own file of prospects.
The company wants each prospect to receive an email from their sales representative and to be able to respond directly.
The recipient file will contain, in addition to the email address of each contact, the name of the assigned sales representative and the corresponding response email.
- The name of the recipient
This advanced option allows you to customize the "To" (recipient) field that appears in the recipient's email application.
It allows to display the content of the variable for example: "Mr X" (recipient) instead of his email address.
The interest of such a personalization is limited and answers a very precise objective:
Make it look like the email was sent manually from a regular email application and that the recipient is in the sender's address book.
This post is also available in:
 Français (French)