How to use slicing in Adobe Photoshop CS3
Once your message is created, cut it into slices.
Give preference to text areas with plain backgrounds as well as blank areas for graphics (no gradients etc...).
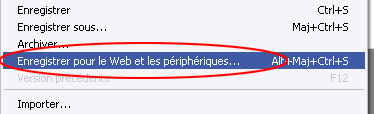
Enter the file menu and select "save for web and devices".
Start by selecting all your slices and go to the hidden menu below to the right of the Finish button (the little arrow) and click on "Optimize for file size".
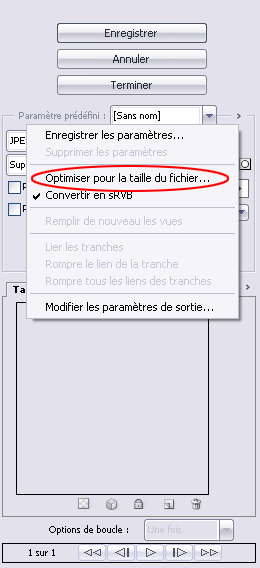
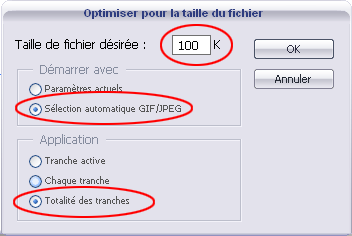
The smaller the message (in weight), the less likely it will be considered spam and the faster it will be sent. We recommend sending an average of 100kb, this figure should not exceed 250kb for an optimal display speed. Select the automatic selection between jpeg and gif and perform your optimization on all slices.
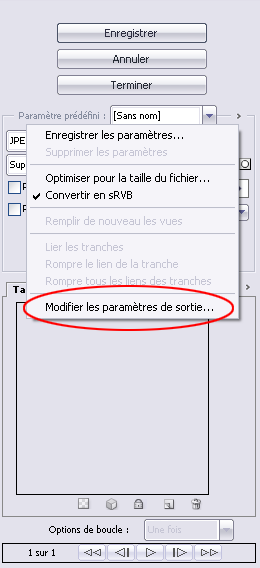
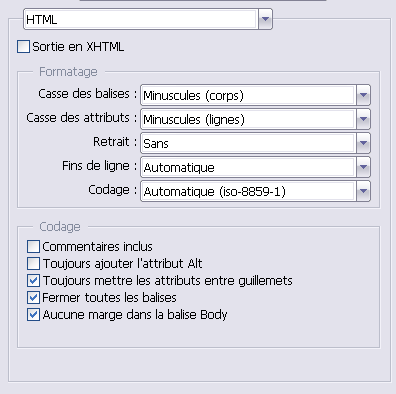
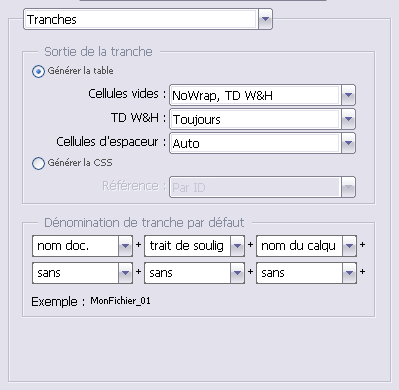
Once this operation is done, we will modify the parameters of the html output, always by going to the hidden menu:
Copy the HTML and slice tabs as below.
Now save your images and your generated html file, your message will be compatible with most web mail clients and software.
This post is also available in:
 Français (French)