Responsive editor tutorial - saving sections
Building a professional, readable newsletter starts with good structure from the very beginning. With the responsive editor, you can easily organize your content, manage margins, and create reusable sections.
In this guide, we’ll walk through step by step how to build your message starting from a blank page, adding blocks, and saving your sections for future use.
How to structure your newsletter effectively in the responsive editor?
To do this, open a brand-new, empty responsive editor to start your email on the right foot:
In a section, always start by adding a block. It makes managing margins much easier.
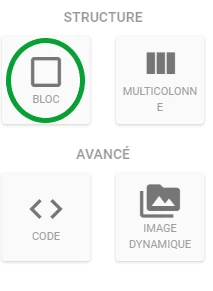
Blocks define the structure of your message. You can nest multiple blocks. Ideally, once the message is structured, each sub-container should have a single function. ⬅️ To do this, click the block on the left of your screen (here circled in green) and drag it to the right onto your workspace. ⬇️⬇️
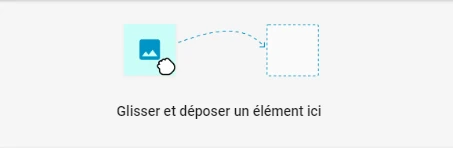
- To add a new block, simply repeat the action: click on a block and drag it into your workspace. The label “New Section” will appear in the top right, where you can add a new one.
How to save your section in the responsive editor?
To easily reuse your messages, you can save a section as follows:
- Select the section you want to save
- Click the three dots on the right of your screen (here circled in green)
- Then click the blue folder (here circled in yellow)
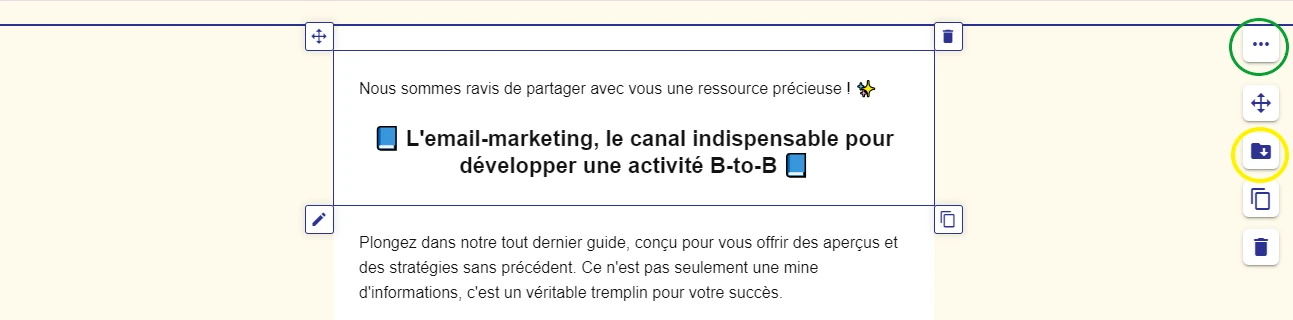
- Once selected, a blue widget appears letting you save and name the section.
This post is also available in Français.