Personalization from a contact list
Introduction
Some general campaign settings, as well as the message body, can include personalization variables from the contact list the campaign recipients come from.
When the campaign is sent, these variables are replaced with the matching value from the contact list.
There is no limit on the number of personalization variables you can use. Any field of the contact list can be referenced.
Building a campaign with personalization
Identifying the personalization variables
Go to the “Databases > Contact lists” section. Open the list you want to use by clicking the icon *
Look at the column names of your contact list:
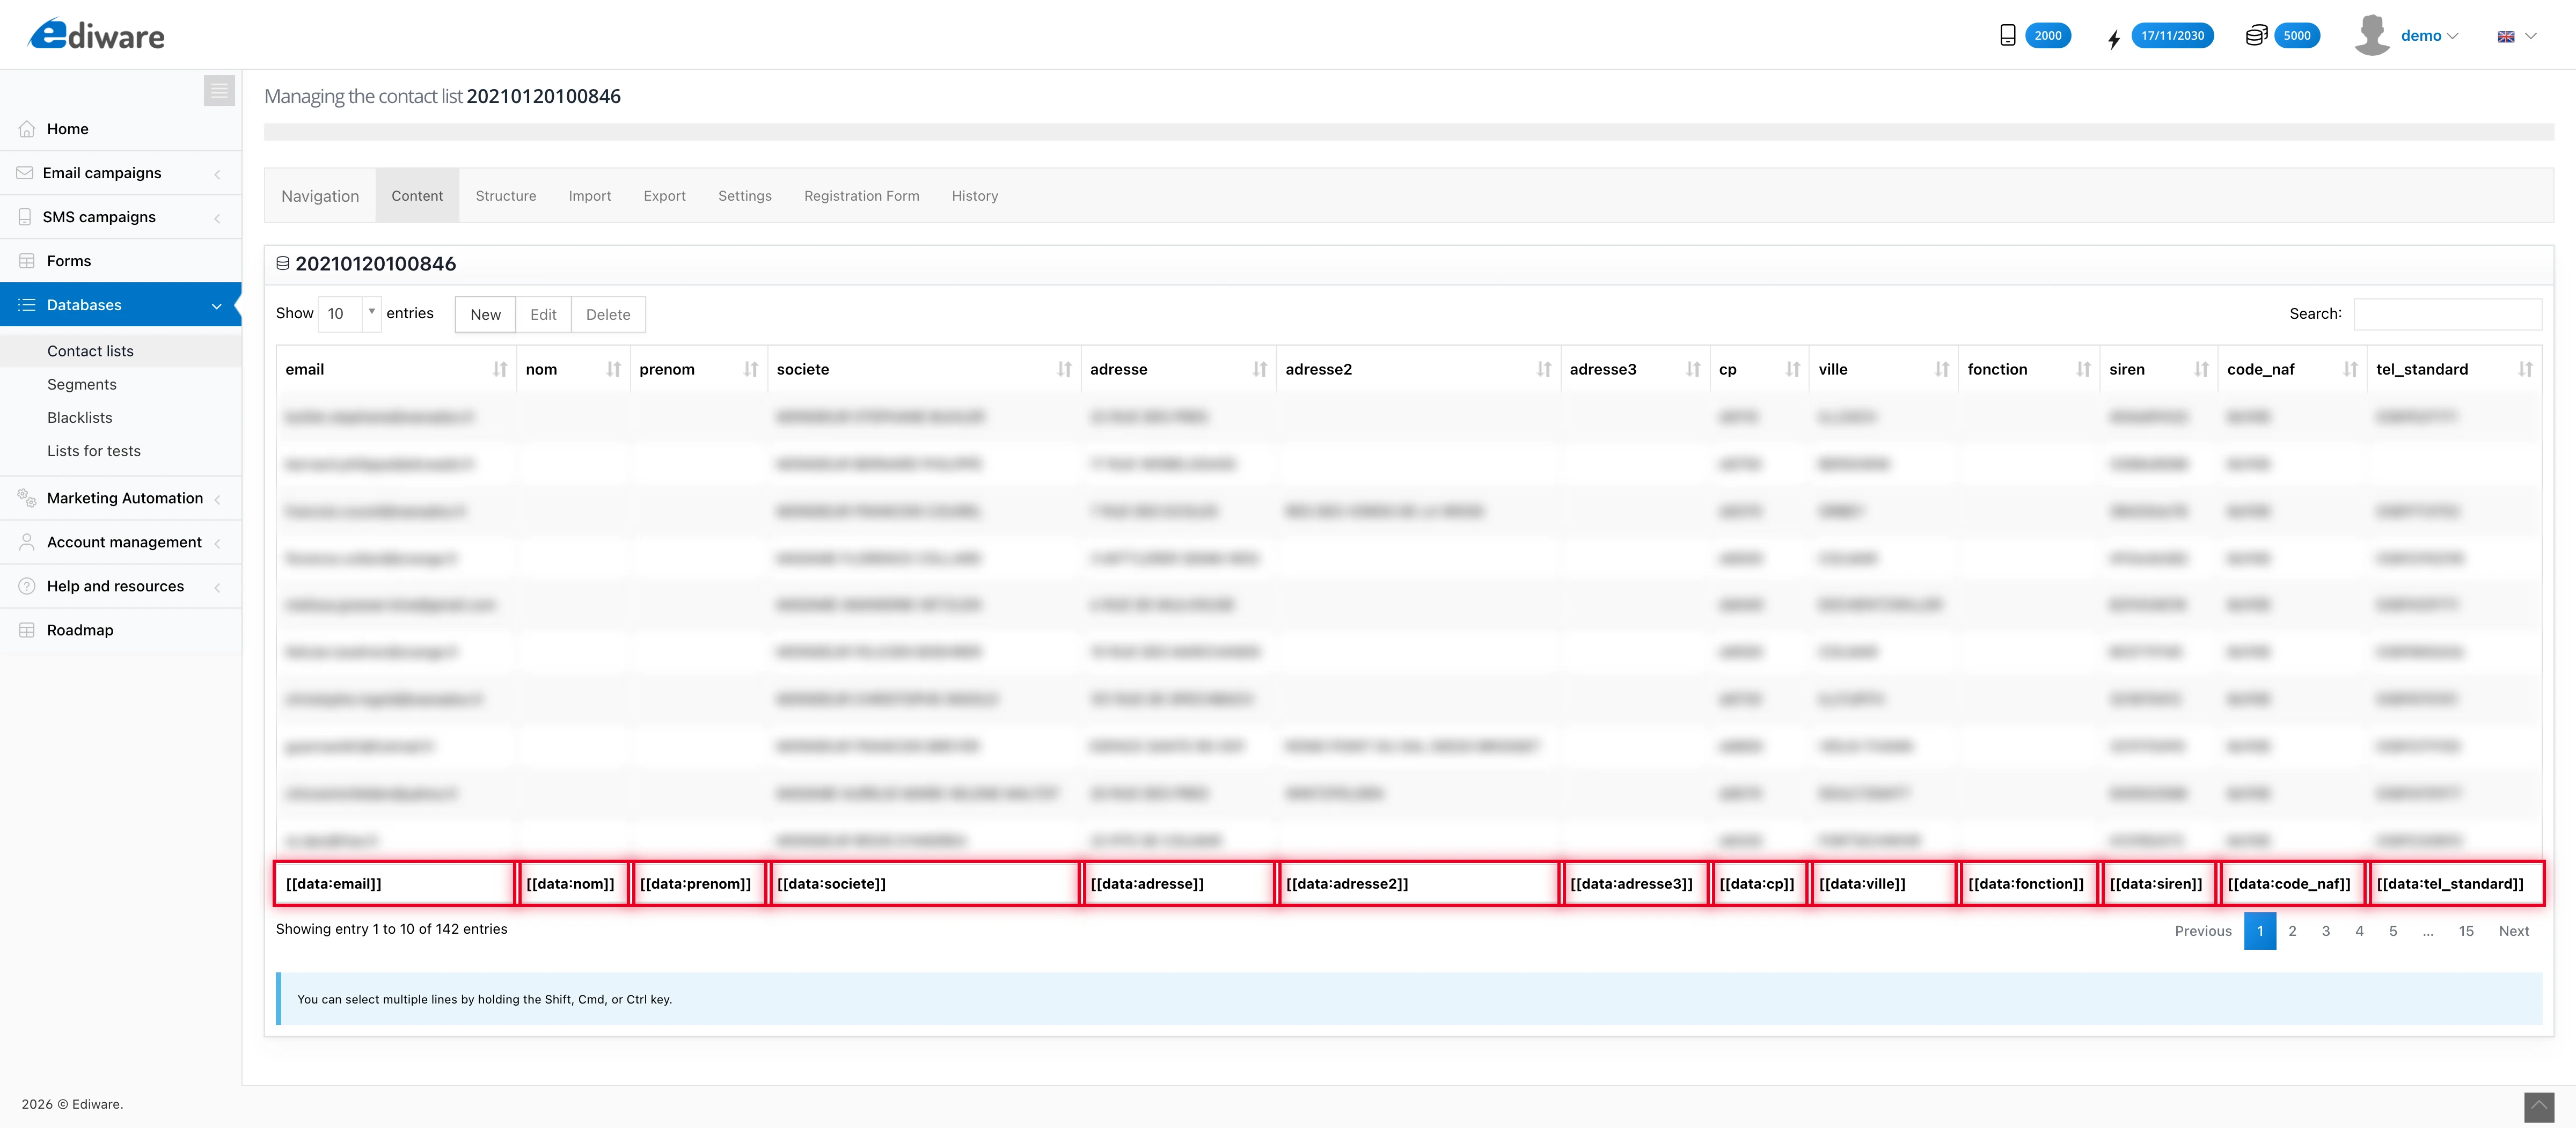
You can edit a row by double-clicking on it.*
Use the checkbox on the right of the row to mark this email address for use in the personalized test send (see MDWorks:Test_the_campaign)
Using the personalization variables
The syntax for personalization without a default value is:
[[data:FIELD_NAME]]If the list content is empty for a given recipient, or if the campaign recipient does not come from a list with this field, the variable will display empty.
The syntax for personalization with a default value is:
[[data:FIELD_NAME:"default value"]]“default value” can contain special characters except for the double quote ("). If you use dynamic variables inside links, be careful not to use characters that could break the URL: & + '
For example:
Hello [[data:prenom]], we have a special offer for [[data:societe:“your company”]].
What can be personalized?
Personalization variables can be placed:
In the message body, anywhere, including inside a URL (to display different images or offer different links depending on the value of a personalization variable).
In the subject line
For example, to display in the subject line: Offer reserved for Mr X
- In the sender name and the reply-to email
Example: each sales rep of a company has their own prospect file.
The company wants each prospect to receive an email from their assigned sales rep, with the option to reply directly.
The recipient file will contain, alongside each contact’s email, the assigned sales rep’s name and matching reply-to email.
- The recipient name
This advanced option lets you personalize the “To” field (recipient) shown in the recipient’s email client.
It can display the variable content, for example “Mr X” (recipient), instead of their email address.
The point of this kind of personalization is narrow and serves a specific goal:
Make it look like the email was sent manually from a regular email client and that the recipient is in the sender’s address book.
Testing the personalization
Once the contacts have been imported into a campaign, click “View” recipients.
This page shows the first 20 records of the recipient file.
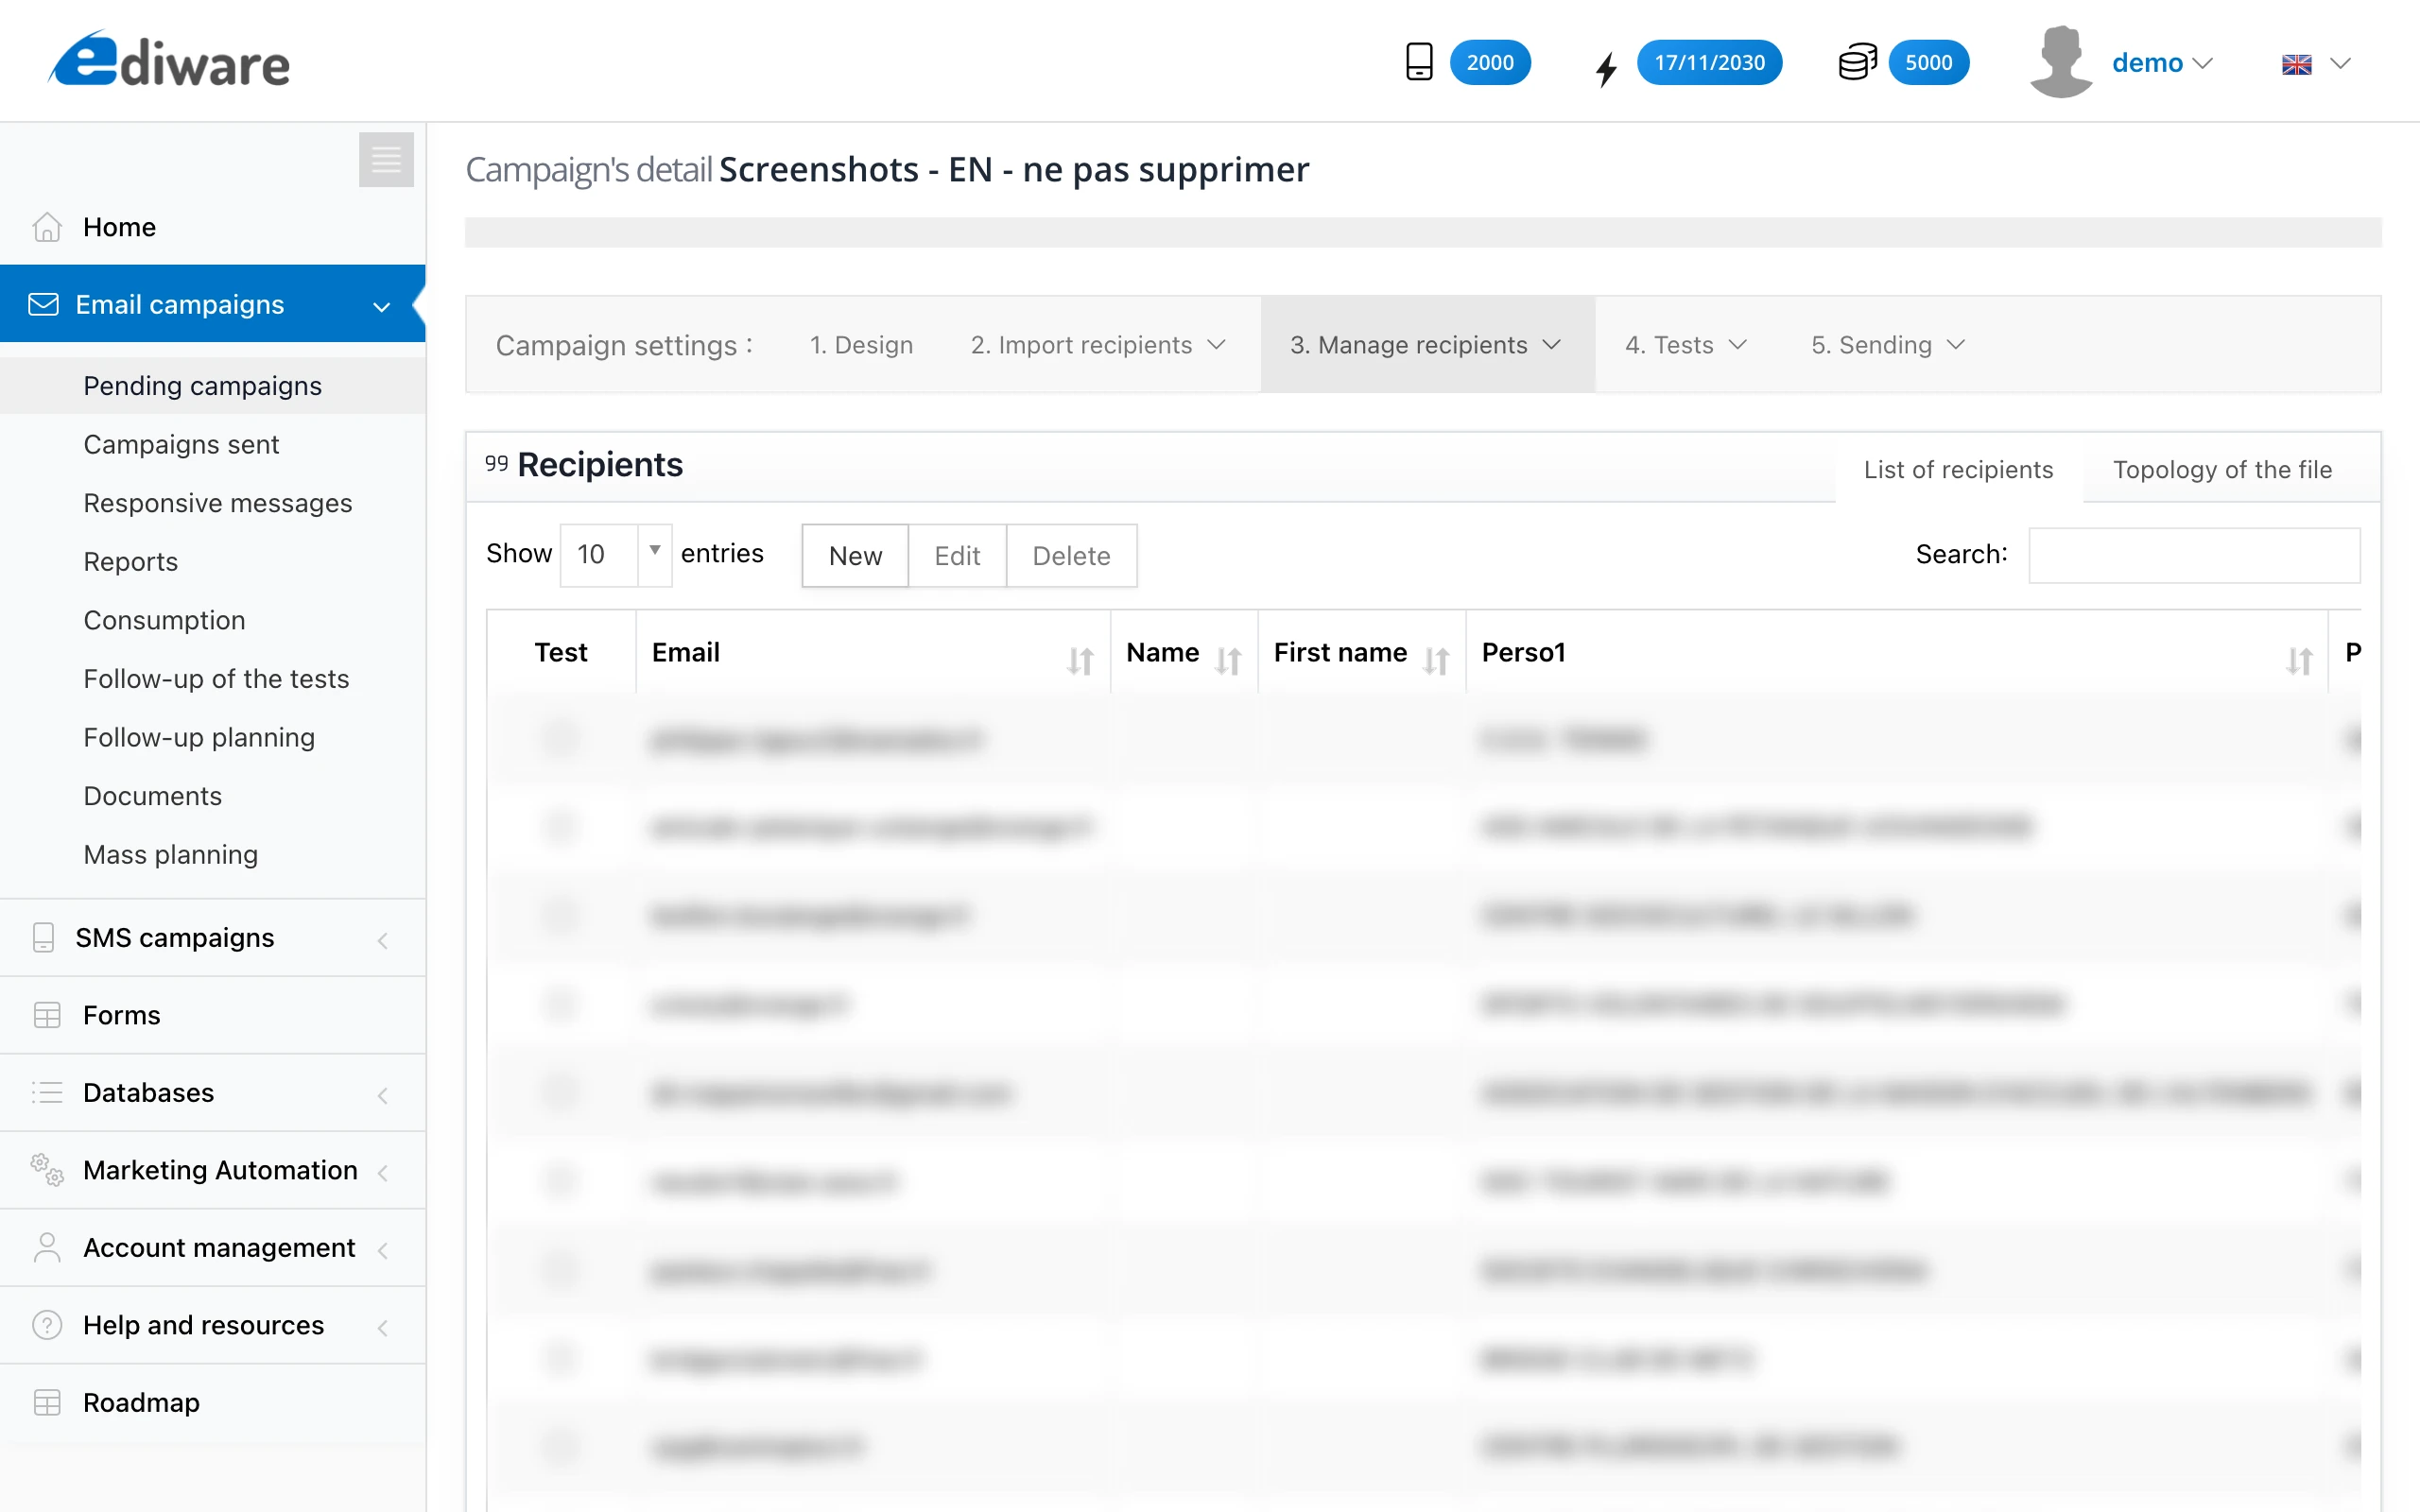
Click one or more checkboxes in the “BAT” column and run a “Personalized test send”. Dynamic personalization from a contact list is compatible with classic personalization (variables %nom%, %p1%, etc…).
Tip
If you always use the same structure across your different contact lists, you can prepare the personalization in your email templates, and it will keep working.